

How to Install a Decomposed Granite Pathway
Published on: July 14, 2023Are you looking to enhance your outdoor space with a charming and durable pathway? Look no further than a decomposed granite pathway. In this blog post, we will explore the benefits of installing a DG pathway and guide you through the simple step-by-step process of creating one in your own yard.

Benefits of Installing a Decomposed Granite Pathway
When it comes to creating an inviting and natural-looking pathway, decomposed granite (DG) is an excellent choice. DG is a type of granitic rock that has weathered and broken down into small particles, commonly used as landscaping material for patios, pathways, and driveways. This versatile material offers numerous advantages, making it a popular option for homeowners and landscape designers alike.
Easy DIY Installation
Building a decomposed granite pathway is a straightforward process that can be completed as a DIY project. With the right tools and materials, you can create a durable and functional pathway in a relatively short amount of time.
Natural and Aesthetically Pleasing
DG pathways have a natural, earthy appearance that adds a rustic and visually appealing element to your outdoor space. The subtle colors and textures of decomposed granite blend well with various landscape designs, creating a harmonious and natural look.


DG Pathways Are Low Maintenance
Decomposed granite pathways require minimal maintenance compared to other landscaping materials. DG pathways are low maintenance due to their natural compaction, which reduces the need for regular repairs or regrading. Additionally, the fine texture of decomposed granite helps to minimize weed growth and allows for easy removal of any unwanted vegetation.
Cost-Effective Landscape Project
Compared to other landscaping materials, DG is generally more affordable, making it a cost-effective option for creating pathways. It allows you to achieve a durable and visually appealing pathway without breaking the bank.


DG Pathway Durability
When properly installed and compacted, decomposed granite forms a solid and stable surface. It can withstand regular foot traffic and even light vehicular use without significant wear or damage. The durability of DG pathways ensures longevity and reduces the need for frequent repairs or replacements.
Design Versatility
Decomposed granite pathways offer versatility in design and application. They can be used in various settings, such as gardens, parks, residential landscapes, or commercial spaces. DG can be shaped to fit curved pathways, creating flowing lines, and it can also be combined with other materials like stepping stones or flagstone for added visual interest.
What You’ll Need for Your Decomposed Granite Pathway
Whether you’re revamping your garden path or creating a charming walkway, having the right supplies is crucial for a successful project. Below we’ll explore the essential items you’ll need to install a decomposed granite pathway.
Stabilized Decomposed Granite
For a firmer DG pathway and easier installation, we recommend our stabilized decomposed granite. Stabilized DG has been mixed with a stabilizing agent, such as a polymer or resin, to create a more durable and long-lasting surface. To learn more about stabilized DG, read our “What is Stabilized DG?” blog post.

Popular DG Options for Pathways:


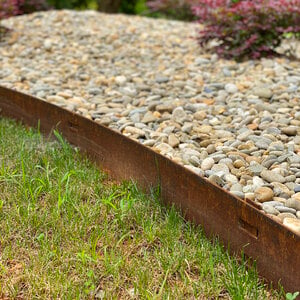
Edging Material & Stakes
Landscape edging refers to a material such as steel, wood, or plastic boards used to create a defined border or edge between different areas in a landscape.

Popular Landscape Edging Products:


Crushed Rock or Gravel Base Material (Optional)
Installing a base layer under your decomposed granite pathway provides a stable foundation and improved durability to withstand foot traffic and bicycle tires without damage or deformation. A crushed rock or gravel base layer also helps with drainage and weed control.

Popular Decomposed Granite Pathway Base Layers:


Weed Barrier Fabric & Staples
Using weed barrier fabric for a DG pathway provides effective weed suppression, preventing unsightly weeds and vegetation from growing through your pathway. Additionally, the fabric helps control moisture levels and prevents erosion, contributing to the pathway’s longevity and stability.


Landscaping Tools Needed:
- Wheelbarrow – Used to transport material more efficiently from one area to another.
- Shovel – Used for excavation and pathway preparation.
- Rake – Used for evening out surfaces and spreading base layer and DG.
- Hand Tamper – Used for compacting the soil, base layer, and DG layer(s).
- Gloves – Always recommended when handling landscape rock material.
Step-by-Step Guide to Installing a Decomposed Pathway
Whether you’re looking to create a charming garden path or a durable walkway, decomposed granite is a versatile material that is easy to install. In this step-by-step guide, we will walk you through the process of installing a decomposed granite pathway from start to finish.
Step 1: Plan Your DG Pathway
Before you begin construction, take the time to plan and prepare for your decomposed granite pathway. Consider the pathway’s purpose, dimensions, desired design, and square footage of your path. Mark out the pathway’s boundaries using stakes and string or paint.
Step 2: Order Landscape Rock Materials
Once you’ve calculated the square footage of your project, use our convenient coverage calculator to help you determine exactly how much material you’ll need. We recommend at least a 2”-3” depth for the decomposed granite and an additional 2”-3” depth for the base layer below it.


Step 3: Excavate and Prepare the Area
Clear the pathway area of any vegetation, rocks, or debris. Using a shovel, dig out the pathway to a depth of around 4-6 inches (10-15 cm). This depth allows for the base materials and helps ensure proper drainage. Remember to provide a slight slope for effective water runoff.
Step 4: Install Edging
Install edging material along the sides of the pathway to define its boundaries and contain the decomposed granite. Plastic or steel landscape edging works well for this purpose. Secure the edging firmly into the ground, ensuring it is level and straight.
Step 5: Lay Down Landscape Fabric
Lay landscape fabric over the excavated pathway area. Trim the fabric to fit within the edging, ensuring complete coverage. Our landscape fabric is available in 3’x50’ and 6’x300’ sizes to cover almost any project.
Step 6: Add the Base Layer
Spread a 2-3 inch (5-8 cm) layer of crushed gravel or road base material evenly over the pathway area. Use a rake to level the base layer, and then use a tamper to firmly compact it. The compacted base layer provides stability and aids in proper drainage.


Pro Tip:
Applying decomposed granite in thin layers, then moistening and compacting each layer, is very important. Otherwise, only the very top of your pathway is compacted and the pathway will become a sandbox once the upper crust cracks.

Step 7: Spread and Compact the DG
Spread a 2″-3″ (5-8 cm) of decomposed granite evenly over the compacted base in layers. Applying decomposed granite in thin layers, then moistening and compacting each layer, is very important, especially if you’re using Stabilized DG. Otherwise, only the very top of your pathway is compacted and the pathway will become a sandbox once the upper crust cracks. Compact your DG using a hand tamper or roller in multiple passes to ensure a solid and durable pathway.
Step 8: Wet and Settle the Decomposed Granite
Lightly spray water over the compacted decomposed granite. This helps settle the material and aids in the compaction process. Ensure you do not overwater, as excessive moisture can cause the DG to become muddy.
Step 9: DG Pathway Finishing Touches & Maintenance
Once the decomposed granite has settled and dried, sweep the pathway to remove any loose debris. As time passes, you may find the need to top up the pathway with additional decomposed granite to maintain its desired depth and appearance. Regularly sweeping the pathway will help keep it clean and prevent weed growth.


Building a decomposed granite pathway is an excellent choice to add beauty and functionality to your outdoor space. With its natural aesthetics, cost-effectiveness, and low maintenance requirements, a decomposed granite pathway offers an attractive and durable surface for walking or light vehicular traffic. By following the step-by-step guide outlined above, you’ll be well on your way to creating a stunning pathway that enhances your landscape for years to come. Enjoy the process and the rewards of your beautifully constructed decomposed granite pathway!


