

How to Build a Dry Creek Bed
Published on: June 09, 2023
How to Build a Dry Creek Bed
When it comes to landscaping, there are endless possibilities to transform your outdoor space into a stunning and functional oasis. One popular feature that has gained considerable popularity in recent years is the dry creek bed. These aesthetically pleasing and low-maintenance features can add a touch of natural beauty to any garden or yard. In this blog post, we will explore the benefits and step-by-step guide to building your very own dry creek bed.


Benefits of Dry Creek Beds
Dry creek beds offer numerous advantages that make them an excellent addition to any landscape. Here are some of the key benefits:
Dry Creek Beds Are a Drainage Solution
One of the primary purposes of a dry creek bed is to manage excess water and control drainage. During heavy rainfall or irrigation, the creek bed acts as a channel, directing water away from areas prone to flooding or waterlogged soil. It helps prevent erosion and keeps water from pooling in unwanted areas, protecting your plants and structures.


Erosion Control with Dry Creek Beds
If you have sloped areas in your landscape, erosion can be a concern. Dry creek beds effectively control erosion by redirecting the flow of water and reducing its velocity. The rocks and gravel within the bed help slow down the water, allowing it to gradually infiltrate the soil and preventing soil erosion.
Aesthetic Appeal of Dry Creek Beds
Dry creek beds add a natural and visually appealing element to your landscape. They create a sense of movement and tranquility, mimicking the appearance of a meandering stream or river. The combination of rocks, gravel, and plants in and around the creek bed adds texture, color, and depth to your outdoor space, enhancing its overall beauty.


Dry Creek Bed Maintenance
Once properly installed, dry creek beds require minimal maintenance compared to other landscaping features. They do not require mowing, watering, or regular pruning. Routine maintenance involves clearing debris and leaves from the creek bed and inspecting for any necessary repairs. The landscape fabric used in the installation help suppress weed growth, reducing the need for ongoing weeding.


Step-by-Step Guide to Building a DIY Dry Creek Bed
By following these simple steps, you can bring a touch of nature to your yard and create a visually stunning focal point.
Planning and Design:
Start by determining the location and path of your dry creek bed. Consider the natural water flow, existing landscape elements, and how the creek bed will fit into the overall design of your yard. Take measurements and sketch out your ideas to create a blueprint.
Excavation:
Mark the boundaries of your creek bed using construction spray paint or stakes. Excavate the area, removing the top layer of soil and creating a channel for the creek bed. Move the dirt over and out to the sides of the creek bed where you later will be placing larger cobbles or rubble, and maybe even some boulders! Vary the depth and width of the channel to create a more natural-looking effect. Make sure you mark all irrigation pipes so you aren’t fixing broken sprinklers later.


Weed Barrier Fabric:
Once the dirt has been removed and you have pushed the excess material to the edges of the creek bed, compact the area using a compactor or simply by walking on it. Then lay down the landscape fabric or weed barrier to prevent weeds from growing up through your creek bed. Weeds – the eternal struggle of the DIY gardener! This simple prep step of using a weed barrier fabric will save you hours of maintenance.
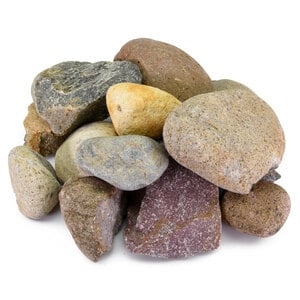
Choosing Landscape Rock for Your Dry Creek Bed:
When creating a creek bed, choosing the material is relatively easy. Almost all dry creek beds use rounded river rock in multiple sizes, plus a few boulders to add some points of interest. With all the different types of river rock and pebble out there, the only thing people can agree on is general size. Below we have outlined the basic sizes to use. Many cobbles will come in all sizes, so if desired you can achieve a uniform aesthetic while varying the sizes.
- On the bottom or middle, use a small size pebble or cobble (1”-3”)
- For the sides, use a mid-size cobble (4”-8”)
- For the top area, use a large cobble (12”-18”)
Need help getting started? Our customers’ go-to cobbles are Arizona River Rock and Mexican Beach Pebble, and our best-selling boulders are Cresta and Sierra.


Plant Selection:
Introduce native plants and shrubs around the dry creek bed to enhance its natural appeal. Choose plants that thrive in your climate and require minimal maintenance. Consider using ornamental grasses, ferns, or low-growing ground covers to soften the edges of the creek bed.
Add Final Touches:
Once all the components are in place, take a step back and assess your dry creek bed. Make any necessary adjustments or additions to achieve the desired look. Consider adding decorative elements like driftwood or strategically placed boulders to enhance the visual impact.
Great Rock Options Dry Creek Beds:


Add a Touch of Natural Charm to Your Outdoor Space
Creating a DIY dry creek bed is an excellent way to enhance your landscape’s beauty while solving common drainage and erosion issues. With minimal maintenance requirements and the flexibility to customize the design to suit your preferences, a dry creek bed is an ideal addition to any garden or outdoor space. Get creative, enjoy the process, and watch as your landscape transforms into a captivating oasis.


